How to Register Your Phone Number on Meta WhatsApp Cloud API (Step-by-Step) – AIHelpTeam.com
By : umoh 25 January 2025 9:50 amAlso See step-by-step Guide How To Integrate WhatsApp Meta API with AIHelpTeam.com Chatbot — which is the first and essential step.
Integrating WhatsApp Meta API with an AI chatbot can help businesses automate customer support and messaging. With WhatsApp Meta API, businesses can integrate AI-powered chatbots to handle queries, process orders, and improve engagement.
In this guide, we’ll show you how to set up WhatsApp Business API, configure WhatsApp Cloud API, and connect it to an AI chatbot using AIHelpTeam.com. You’ll also learn how to create a WhatsApp app on Facebook Developer and set up the WhatsApp Messaging API for smooth communication. Follow these steps to get started quickly and improve your customer interactions.
Step 1: Create a Meta Developer Account
-
Go to Meta for Developers
-
Log in with your Facebook account
-
Click "My Apps" → "Create App"
-
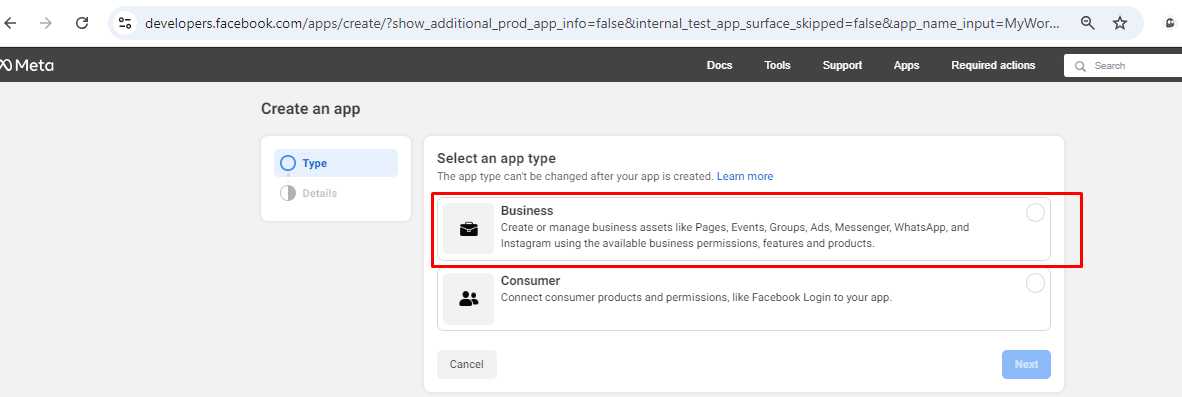
Choose Business type
-
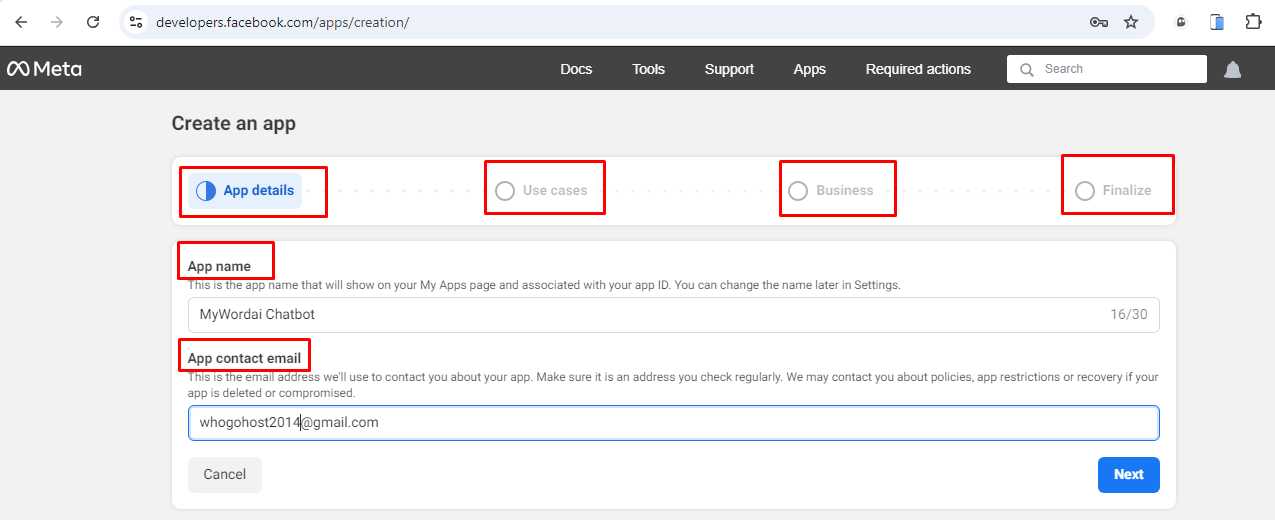
Name your app (e.g., “AIHelpBot”) and add contact email
-
Click Create App
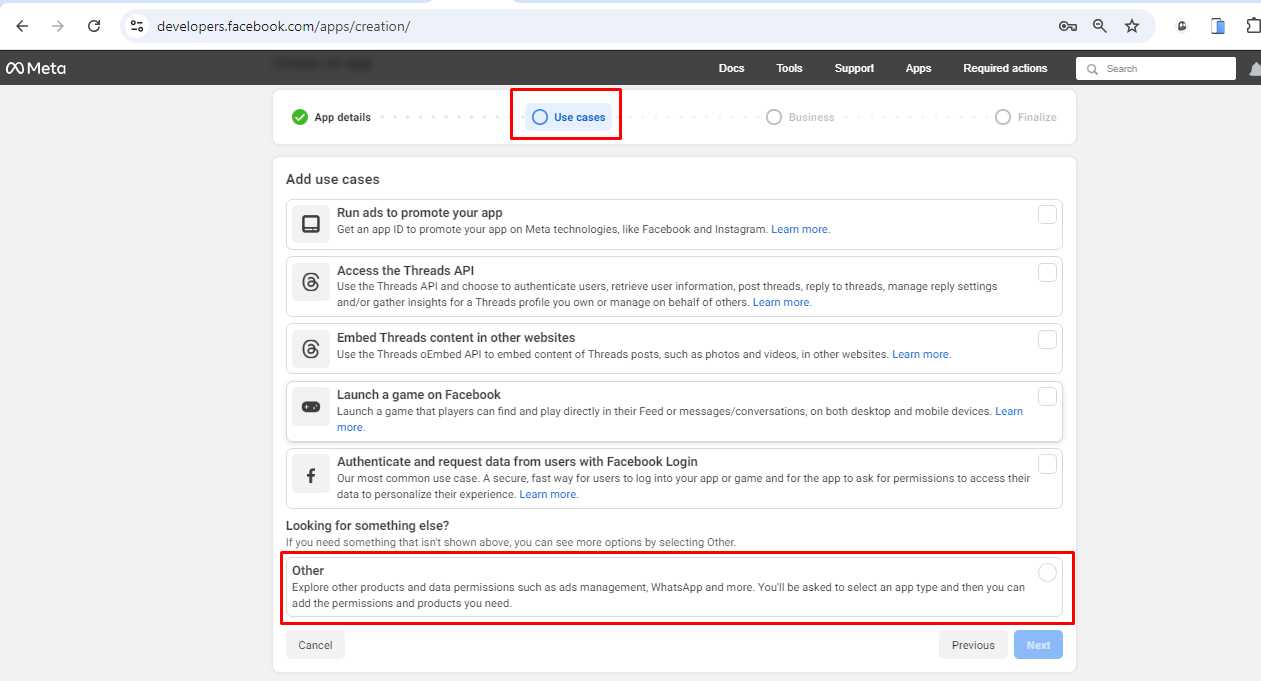
- Under Use Cases: Choose OTHER under Used Cases ( for whatsapp and more)
- Under Select an App Type: select BUSINESS.
- Under Details: Add your App Name and contact email. Under the Business portfolio select your Business portfolio or leave it empty for Meta to automatically create for you, using your name
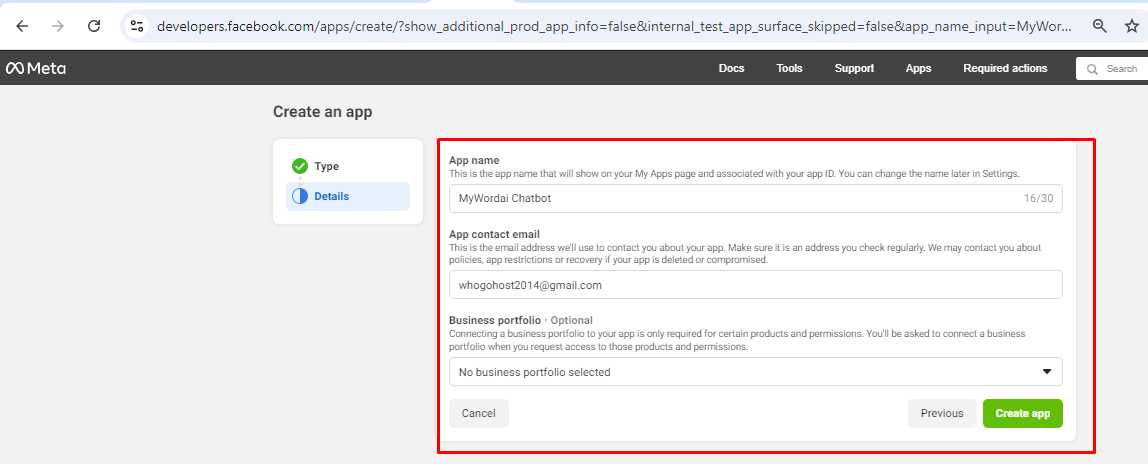
Step 2. Add WhatsApp to Your App:
After creating the app, you’ll be redirected to the App Dashboard.
- Under the list of Products, select WhatsApp and click "Set Up".
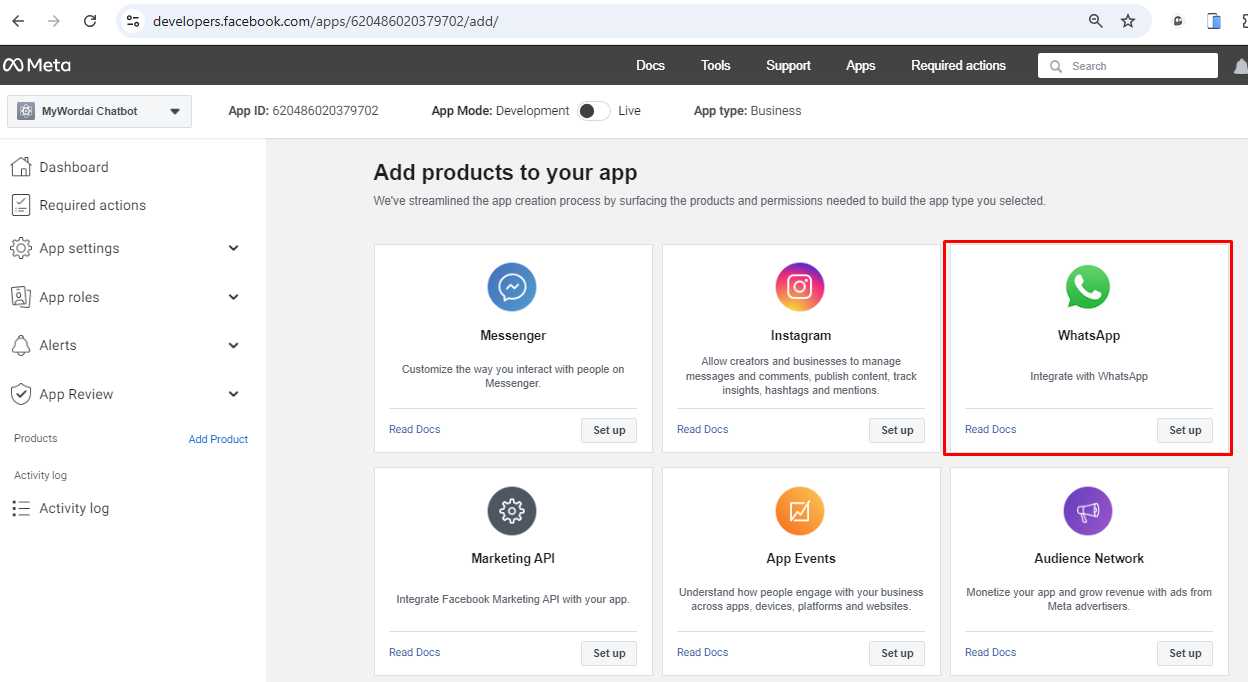
Step 3. Configure WhatsApp Settings in the WhatsApp Business API Page
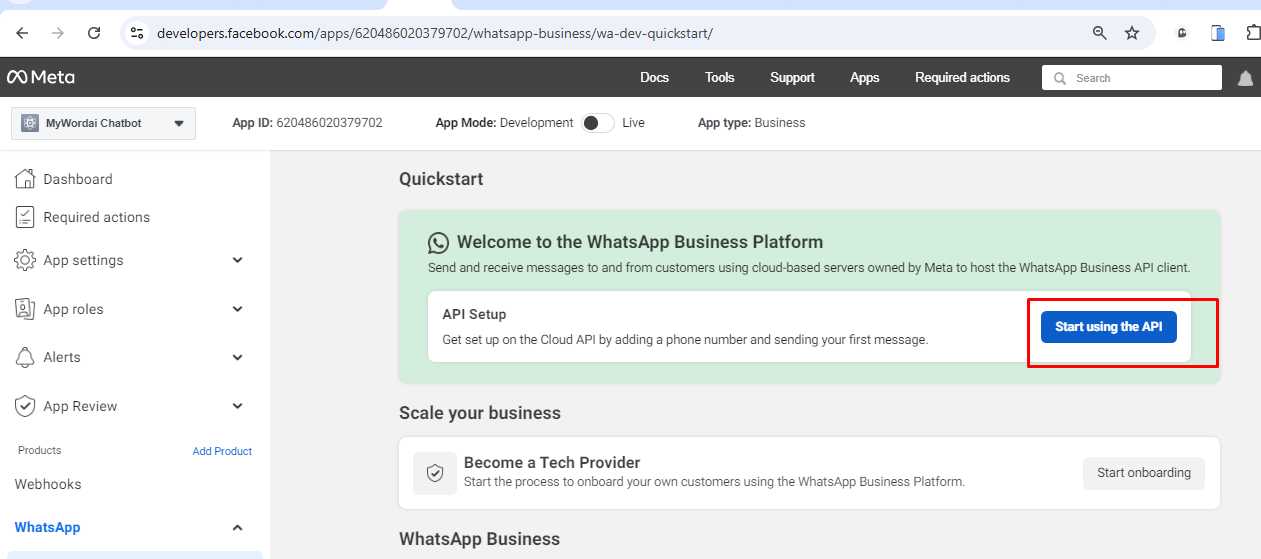
Once you click Set Up from the step 3 above the WhatsApp Business Platform API pops up
- Select a business portfolio and link your Business
- Click Continue to complete the setup.
Step 4. Add and Verify Your Phone Number
-
Go to API Setup
Navigate: My Apps > [Your App] > WhatsApp > API Setup -
Click “Add Phone Number” on the right panel
-
Fill in:
-
Display Name (shown on WhatsApp)
-
Business Category
-
Timezone
-
Description (optional)
-
-
Enter the phone number you want to use (must not already be a WhatsApp number)
-
Choose to receive OTP via SMS or call
-
Enter the code and click Next
✅ Done — phone number is now verified
- Add a New Phone Number For Your Whatsapp Cloud AI Autamation ( Phone number must not be linked to any whatsapp account):
On the API Setup page, on Step 1: Select phone numbers, click the Test number: +15551431775 in the dropdown select add phone number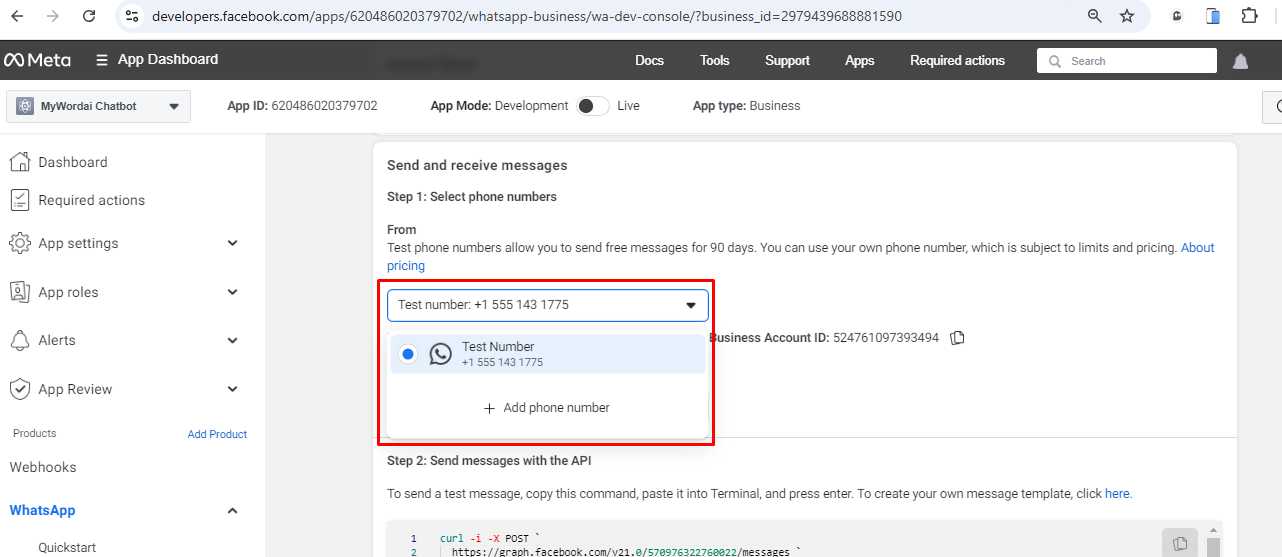
It opens into the form below.
Fill the form with your correct and accurate business information and add a phone number that has not been used on whatsapp for verification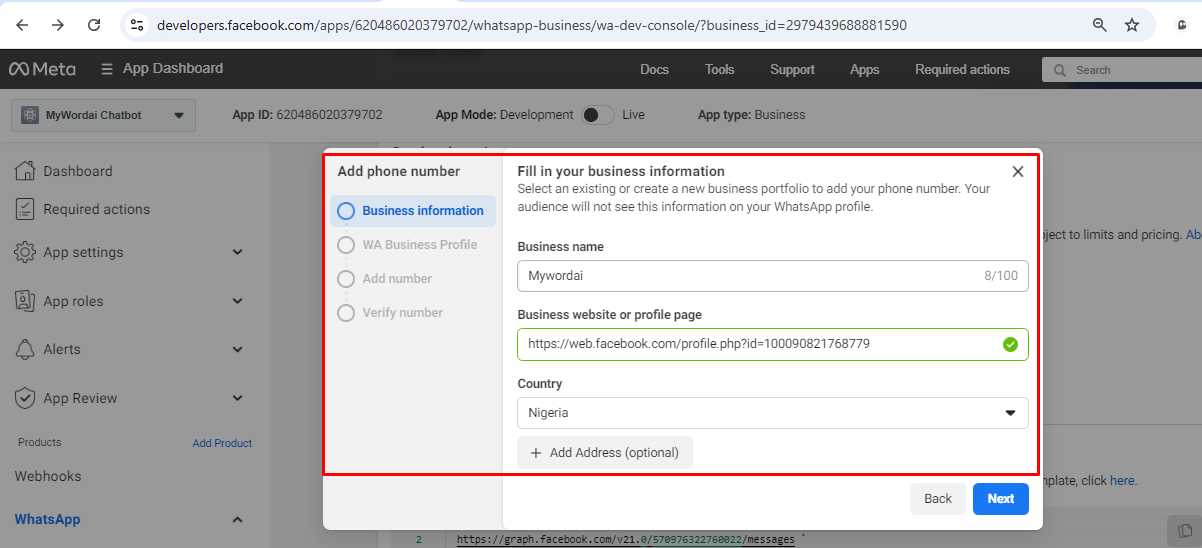
Step 5: Add a Payment Method
Required to activate full messaging (after free 1,000 conversations/month)
-
Add a valid Visa or MasterCard
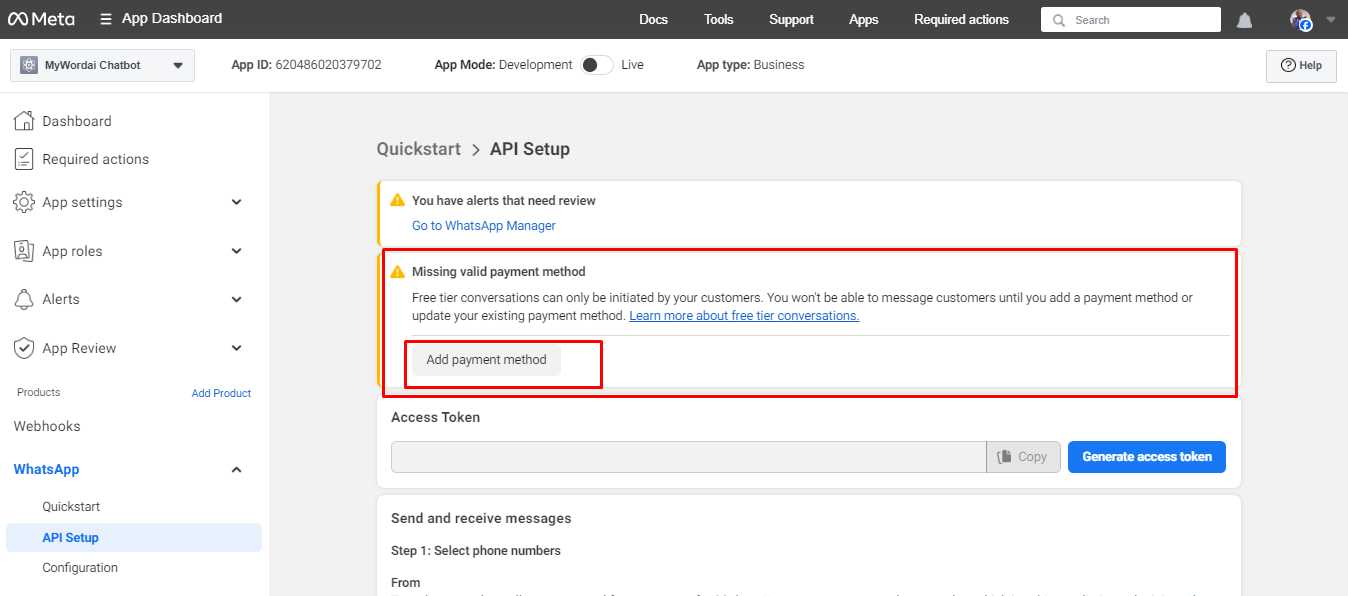
Click the below Payment Settings button to add your card details as payment option. For Nigerians if your bank card is not accepted by Meta, then you may use the Grey Card. It accepts all kind of international payments
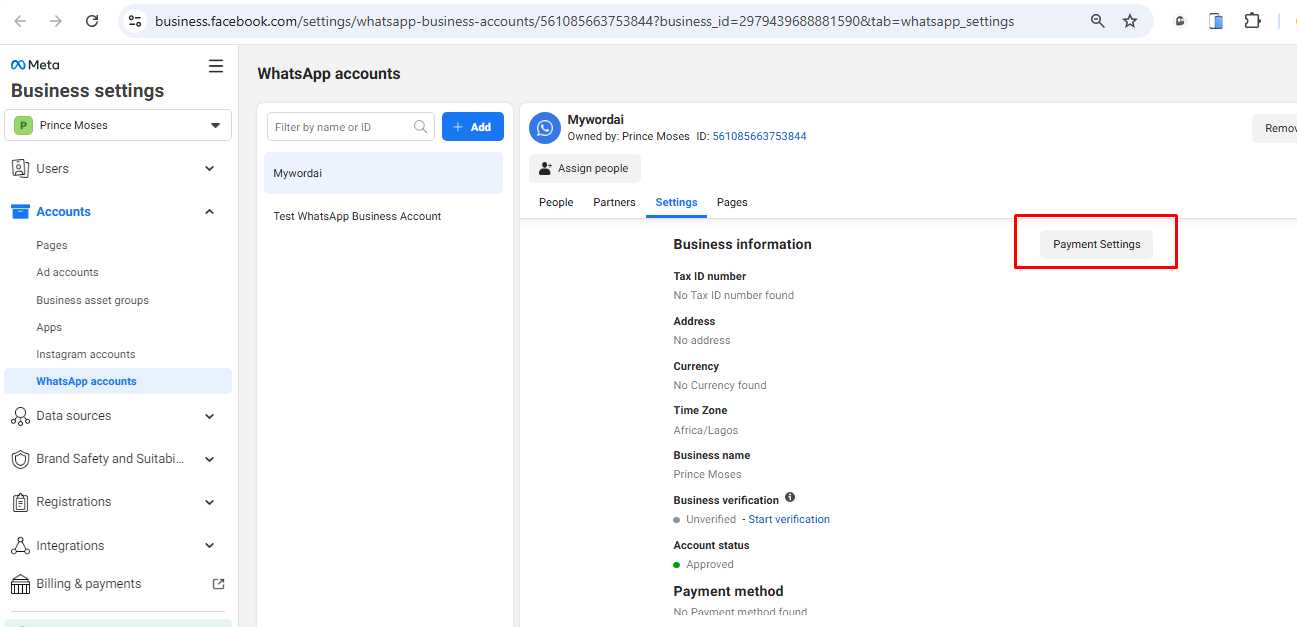
Step 6: Check Status of Your Phone Number, If its Connected
Visit:
https://business.facebook.com/wa/manage/phone-numbers
If you see "Connected" — you're good to go!
Step 7: Complete Business Verification (Optional)
While business verification is not mandatory, it enhances your API capabilities, including higher messaging limits and business name visibility
Although, completing your business verification on Meta is important but not compulsory. However, you won't be able to access certain features like higher messaging limits and your business name might not display properly in the WhatsApp app for customers.
To verify your business on Meta, find the business verification link on the same page as step 6 above
Step 8: Test Sending a Message
-
Go back to API Setup
-
Use the Test Message tool to send a message to a verified WhatsApp number
 FIX: If Your Phone Number Is Still Showing “Pending”
This sometimes happens when Meta accidentally flags your number for On-Premises API. In that case, manually register using the Graph API.
Step-by-step:
1. ✅ Go to: Graph API Explorer
And follow th below steps
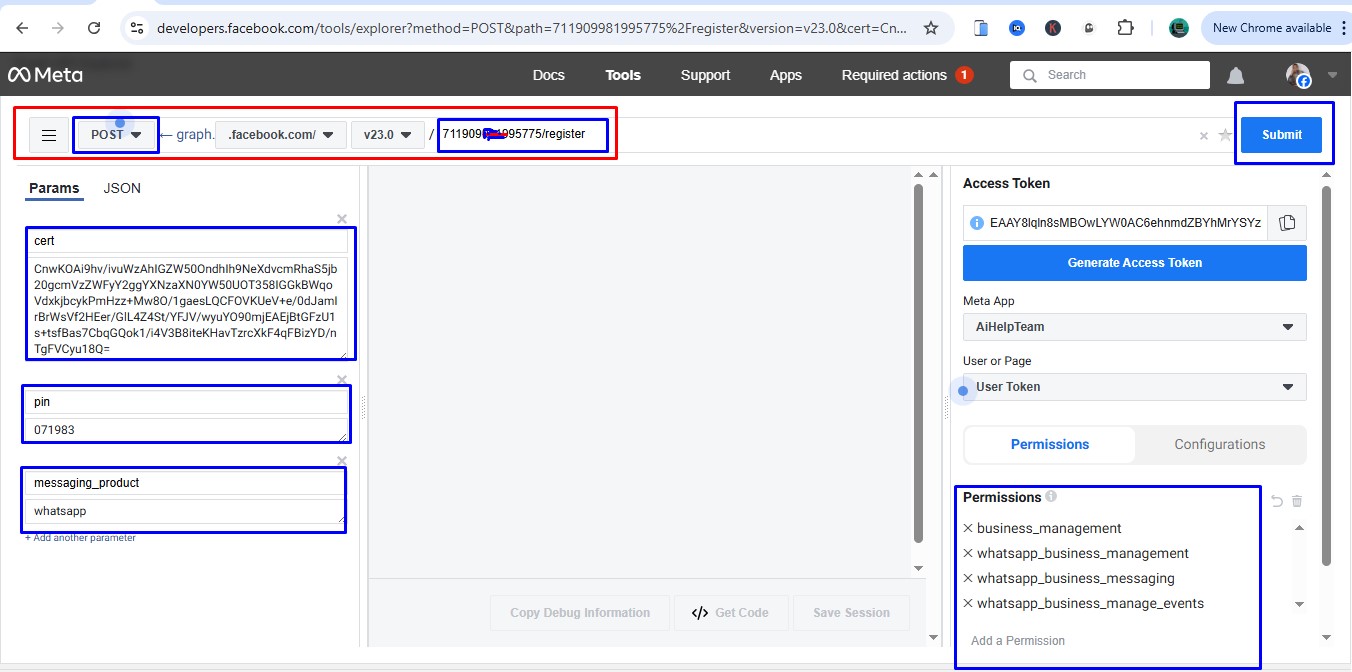
Step 2: Configure the Request
- On the right panel:
- Select your Meta App
- Select User Token
- Click Permissions
- Check all of the following:
business_managementwhatsapp_business_managementwhatsapp_business_messagingwhatsapp_business_manage_events
- Check all of the following:
Step 3: Prepare the API Call
- On the top bar:
- Change the method to:
POST -
Replace the default path of /me?fields=id,name with: //register
(Find your phone number ID in WhatsApp > API Setup page)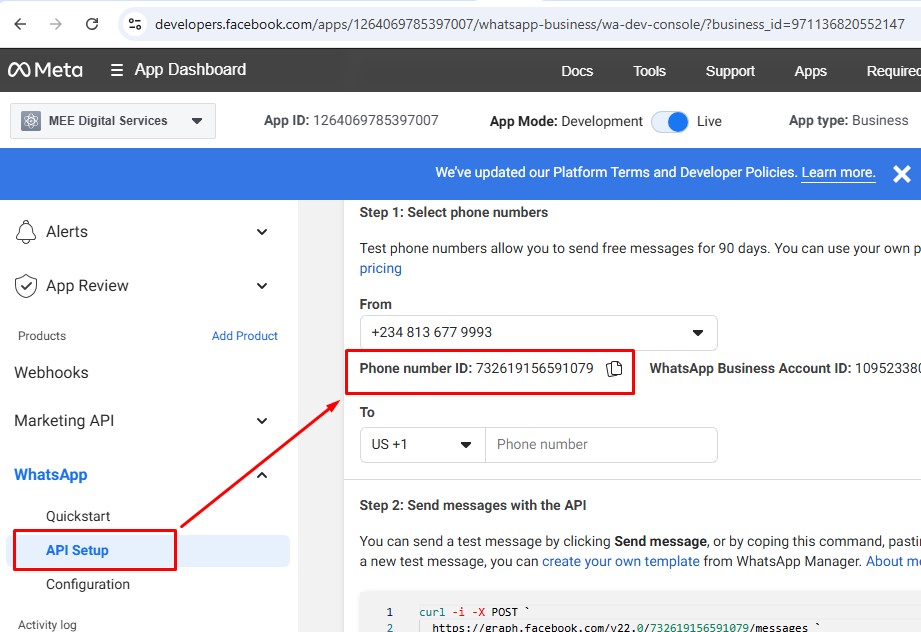
- Change the method to:
Step 4: Add Parameters (on the left side under “Params” tab)
Click "Add another parameter" three times and enter the following:
| Key | Value |
|---|---|
cert |
Paste the full text of your certificate (from WhatsApp Manager) |
pin |
Enter any 6-digit number (e.g. 123456) |
messaging_product |
whatsapp |
To get the certificate:
- Go to https://business.facebook.com/wa/manage/phone-numbers
- Click your phone number
- Scroll to Certificate section
- Open the file and copy all the text (paste into the
certparameter)
Step 5: Submit
Click the blue Submit button at the top.
If successful, you will see:
{
  "success": true
}
Step 6: Confirm Phone Number is Connected
Visit:
https://business.facebook.com/wa/manage/phone-numbers
Your phone number status should now show Connected instead of Pending.
You can now send messages from the Test Message Terminal or integrate via API.
 Done! Your WhatsApp Cloud API phone number is now active. You can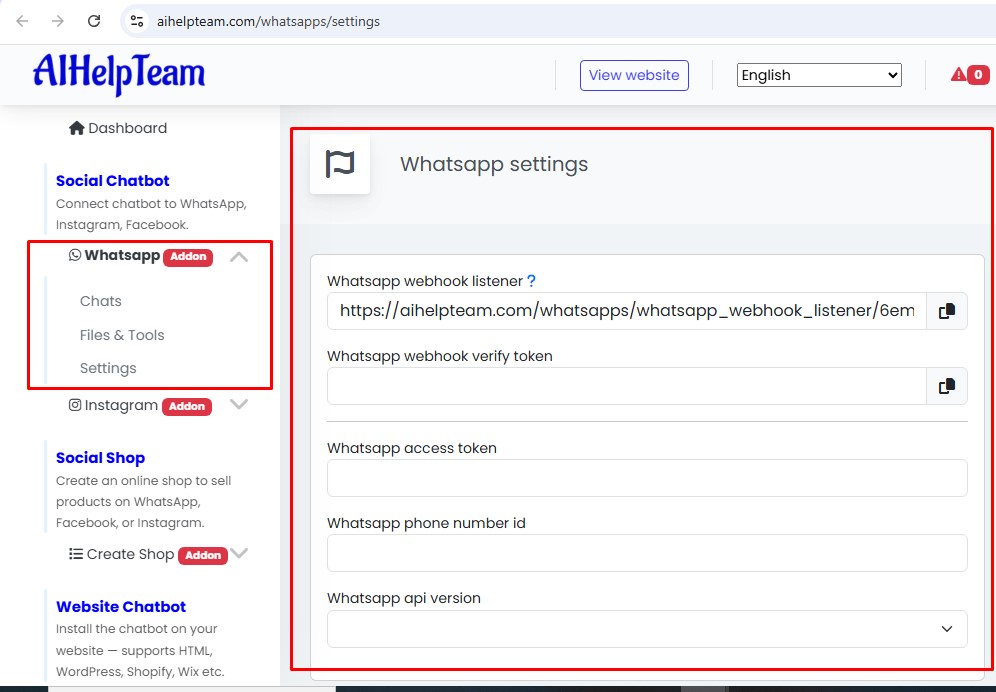
.png)



No Comments